TM100 is a Transponder Key Programmer for All Key Lost cars. TM100 Transponder Support Total 62 Modules . TM100 Transponder Key Programmer New functions for reading the Kilometers, VIN and transponder type for all BMW keys was added to the BMW software module! Immo pin code is also displayed for some car models.
TM100 key programmer is a strong competitor of Tango and even better.
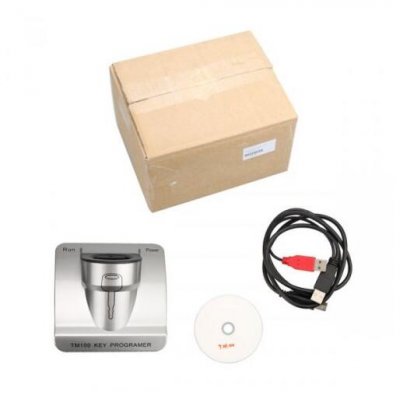
Such a powerful Transponder Key Programmer, Do you know how to set it up? now obd2cartool.com will detail to you!
Howto guideTM100 transponder programmer as below:
How to guide TM100 Key Programmer / TM100 transponder programmer Function List
How to edit odometer for BMW CAS4, CAS4+?
First, select Tools→ Dump Editor→ BMW→CAS4 odometer setting.
Open dump file, current odometer value is displayed, input new odometer value, and set new value.
Save new generated file and write it back to CAS4.
How to save ISN for BMW?
Select key maker for BMW CAS3+ adding key.
After original key decoded, TM100 will save 16-byte ISN for you.
If the same car lost all keys, you can use the saved ISN to do all key lost without reading ISN from DME.
How to save ISK for BMW?
Select key maker for BMW CAS4+ adding key.
After original key decoded, TM100 will save 16-byte ISK for you.
If the same car lost all keys, you can use the saved ISK to do all key lost without reading ISK from DME.
How to clone TIRIS 4D?
Select Tools→ Clone→ Tiris 4D.
Connect TM100 key cloner to PC.
Put original key into coil of TM100 key programmer to decode.
If decode success, put YS01/TPX2/EH2 transponder into coil of TM100 key programmer.
How to clone HITAG2?
Select Tools→Clone→PCF7936.
Collect signature data: put sniffer antenna of TM100 key cloner near ignition, turn ignition on by original key. If collect success, red LED will blink once. If not, collect data again.
Connect TM100 key cloner to PC.
Put original key into coil of TM100 key programmer to decode.
If decode success, put YS21/GMT46 transponder into coil of TM100 key programmer.
How to copy MEGAMOS ID13?
Select TP Reader, click “MEGAMOS 13”.
Put original ID13 chip into coil, click Read.
Put T5 into coil, click Write.
How to copy TEMIC 8C?
Select TP Reader, click TEMIC 8C.
Put original 8C chip into coil, click Read.
Put TK5561 into coil, click Write.
How to make VAG dealer key by 7-byte CS?
Select TP Reader, click “MEGAMOS 48”, click button “Dealer key by 7-byte CS”.
Input 7-byte component security, select brand, put new key into TM100 coil.
Click button “Make dealer key”.
How to search the 7th byte for VAG?
Select TP Reader next click “MEGAMOS 48” then click button “Search 7th CS”.
Input 6-byte component security, select brand and put the working key into coil.
Click button “Search”.
How to edit ID46 transponder IDE?
Select TP Reader, click “PCF7936”.
Input 4-byte IDE at P0, click button “Write”.
How to unlock key for BMW?
Select Tools→ Unlocker→ BMW→ Unlock HITAG by CAS dump.
Open CAS dump file, put key to be unlocked into coil and click button “Unlocker”.
How to unlock key for VW, Passat B6?
Select Tools→ Unlocker→ VW→ Passat B6→ Comfort Module, Unlock HITAG by 95320.
Open 95320 dump file, put key to be unlocked into coil and click button “Unlocker”.
How to synchronize CEM and ECU of Volvo?
Open TM100 software, select “Tools”, select “Dump Editor”, select Volvo, CEM+ECU.
Open dialog, open CEM and ECU dump file, check and make synchronization.
How to calculate Nissan 20 digit Pin Code?
Open TM100 software, select “Tools” then select “Calculator”.
Open dialog, input 20-digit Pre-PIN, click “Calculate”.
OBD2cartool.com is specializing in the production of Cars, Trucks & Motorcycle Diagnostic Tools and Equipment, OBD2 Trouble code reader, auto pixel repair parts, car key programmer, ecu chip tuning tool, auto locksmith tool, car key remote controls, universal programmer device...the best choice of Car Diagnostic Shop, Auto Repair & Service Shop, Diy Car Mechanic, Garage, and Workshop.
Friday, February 17, 2017
Wednesday, February 15, 2017
How to use Digiprog 3 V4.94 do program EEPROM?
Digiprog 3 is the most popular Odometer correction tool, Latest V4.94 Digiprog 3 Mileage programmer add more car models on the basic of Digiprog III odometer.
But do you know how to program EEPROM with digiprog 3 odometer correction tool through “EEPROM”menu. there obd2cartool.com will help you to know:
EEPROM programming with Digiprog 3 is done through some adapters, for example, 01/04 Adapter, Digiprog 3 ST02 cable or others. These adapters can be purchased at local aftermarket shops or from online stores.
EEPROM chip 01/04 Adapter picture :
Notes before you start:
1. De-solder eeprom
2. Make sure the contact points or legs with glass fiber pin thoroughly.
3. Clean clearly with sandpaper, etc
4. Insert eeprom correctly into Digiprog3 ST01/ST04 adapter, and make sure they are contacting.
How to programming EEPROM via digiprog 3 mileage correction tool?
1. Connect DP3 device to your car via OBD connector
2. Enter “EEPROM” menu
3. Read data from EEPROM and store them in digiprog3 Follow this way:
Select the “SET TYPE” and choose “93C46″, then your digiprog has been set up to read a 93C46 chip. Press “EEPROM” again and then “READ”. There will show you the information on the digiprog III screen when the reading is complete. Now press “VERIFY” so the information on your screen can agree with the Eeprom.
Next click the “FILE” and there will show you another submenu, you can click “SAVE” and enter a file name for the information you are saving. Once you entered the file name, your data is safe and the vehicle is now ready to be reprogrammed.
4. Get EEPROM from ST01/ST04 adapter and reload it;
5. Select the function EEPROM COMPARE;
6. Then it is the previous read data on digiprog 3 but not the internal memory, comparing it with the now re-inserted EEPROM;
NOTE:
Error message may appear during the process, restore or reprogram, restore the original data status and it will be
fixed.
External eeprom programmer Read and store data status Take EEPROM from the adapter and insert it again
Re-read data level and save it
Comparison on data sets in the editor (windows—total commander)
If the comparison is identical, it is correct.
If the data is restored already, the reprogramming error shows the original data
Data state produced!
But do you know how to program EEPROM with digiprog 3 odometer correction tool through “EEPROM”menu. there obd2cartool.com will help you to know:
EEPROM programming with Digiprog 3 is done through some adapters, for example, 01/04 Adapter, Digiprog 3 ST02 cable or others. These adapters can be purchased at local aftermarket shops or from online stores.
EEPROM chip 01/04 Adapter picture :
Notes before you start:
1. De-solder eeprom
2. Make sure the contact points or legs with glass fiber pin thoroughly.
3. Clean clearly with sandpaper, etc
4. Insert eeprom correctly into Digiprog3 ST01/ST04 adapter, and make sure they are contacting.
How to programming EEPROM via digiprog 3 mileage correction tool?
1. Connect DP3 device to your car via OBD connector
2. Enter “EEPROM” menu
3. Read data from EEPROM and store them in digiprog3 Follow this way:
Select the “SET TYPE” and choose “93C46″, then your digiprog has been set up to read a 93C46 chip. Press “EEPROM” again and then “READ”. There will show you the information on the digiprog III screen when the reading is complete. Now press “VERIFY” so the information on your screen can agree with the Eeprom.
Next click the “FILE” and there will show you another submenu, you can click “SAVE” and enter a file name for the information you are saving. Once you entered the file name, your data is safe and the vehicle is now ready to be reprogrammed.
4. Get EEPROM from ST01/ST04 adapter and reload it;
5. Select the function EEPROM COMPARE;
6. Then it is the previous read data on digiprog 3 but not the internal memory, comparing it with the now re-inserted EEPROM;
NOTE:
Error message may appear during the process, restore or reprogram, restore the original data status and it will be
fixed.
External eeprom programmer Read and store data status Take EEPROM from the adapter and insert it again
Re-read data level and save it
Comparison on data sets in the editor (windows—total commander)
If the comparison is identical, it is correct.
If the data is restored already, the reprogramming error shows the original data
Data state produced!
Saturday, February 4, 2017
Nice Wifi Samtec Piwis Tester 2 with CF30 plus V18.10 Full set Ready to Use
Piwis Tester II is the latest professional
tester for Porsche,with samtec piwis tester 2 hardware,powerful
functions,full access. Wifi piwis tester ii work with the full system
porsche car ,Piwis II Wireless tester comes with best piwis ii VCI ,
support online function, samtec piwis tester 2 with the panasonic CF30 laptop
and V18.100 software for the test.
PIWIS II the wifi solution is 100% OEM as dealership ones, you can choose both USB (LAN) connection and Wireless (WLAN) function, also the wifi singal is really strong, which over 30 meters. what more, we also will add free one Wireless Router to stronger your singal with wifi Piwis tester 2.Please NOTICE, the PCB we use Samtec PAN scheme not J2534 one!
A prerequisite for using wLAN is the availability of a suitable infrastructure. The workshop safety
guidelines must also permit the use of radio networks.
Connect the VCI to the PC using the supplied USB cable and start the VCI configuration software.
This can be accessed via the relevant link in the basic software.
The necessary setup steps are described separately in the section entitled wLAN configuration.
In order to establish a wLAN connection, the USB connection must be removed once configuration has been completed successfully.
This is because once established, the USB connection is always active.
Only use IP addresses approved for local operation (e.g. 192.168.x.x) in the local wLAN/LAN
Example:
Network: 192.168.1.0, subnet mask 255.255.255.0
• Addresses that can be used: 192.168.1.1 up to 192.168.1.254
• Router address (gateway): 192.168.1.254
• Client addresses (e.g. VCI, laptop): 192.168.1.1 up to 192.168.1.100 (max. 100 participants)
PIWIS II the wifi solution is 100% OEM as dealership ones, you can choose both USB (LAN) connection and Wireless (WLAN) function, also the wifi singal is really strong, which over 30 meters. what more, we also will add free one Wireless Router to stronger your singal with wifi Piwis tester 2.Please NOTICE, the PCB we use Samtec PAN scheme not J2534 one!
A prerequisite for using wLAN is the availability of a suitable infrastructure. The workshop safety
guidelines must also permit the use of radio networks.
Connect the VCI to the PC using the supplied USB cable and start the VCI configuration software.
This can be accessed via the relevant link in the basic software.
The necessary setup steps are described separately in the section entitled wLAN configuration.
In order to establish a wLAN connection, the USB connection must be removed once configuration has been completed successfully.
This is because once established, the USB connection is always active.
Only use IP addresses approved for local operation (e.g. 192.168.x.x) in the local wLAN/LAN
Example:
Network: 192.168.1.0, subnet mask 255.255.255.0
• Addresses that can be used: 192.168.1.1 up to 192.168.1.254
• Router address (gateway): 192.168.1.254
• Client addresses (e.g. VCI, laptop): 192.168.1.1 up to 192.168.1.100 (max. 100 participants)
Tuesday, January 17, 2017
T300 V16.8 TCODE Key Programmer English Spanish Turkish User Manual
Automan T-code T300 transponder key programmer is designed to do key programming. obd2cartool.com T300 auto key programmer can support the main brand of Asian, European and American T-300 key programmer have English Spanish and turkish version. V16.8 t code T300 key programmer support multi-brand vehicles.
T300 Key Programmer English / Spanish / Turkish T300 Chip Key Decoder
T300 v1.68 Key Programmer Install Steps:
For VW Transponder key matching with 5 digits Login Code
Procedure for adding transponder keys to vehicles with separate Immobilizer box:
(Golf 3, Passat B4, Transporter, Lupo, Sharan)
1) Switch ignition ON with new key.
2) Select: Immobilizer -> Login: Enter 5 numbers Login Code (add 0 if you have 4 digits Login Code). For example, if your Login is 1234, enter 1234 -> Save
3) Go to Adaptation
4) Enter 01 in "Channel Number"
5) Enter
6) Enter number corresponding to the total number of keys to be matched, The "Stored Value" is the number of keys currently matched. For example, Enter 2 -> Save
7) Switch ignition off and remove key
8) Insert next key to ignition and switch ignition on again. Wait 15 sec. Repeat this step with each key until all keys have been matched.
9) Select: Immobilizer -> Login. Enter Login Code. Go to Adaptation
10) Enter 00 in "Channel Number"
11) Enter 0 and Save. This will learn ECU with Immobiliser.
Procedure for adding transponder keys to vehicles with Immobilizer in the instrument cluster:
(Golf 2004, Passat B5, B6 )
1) Switch ignition ON with new key.
2) Select: Instrument -> Login: Enter 5 numbers Login Code (add 0 if you have 4 digits Login Code).For example, if your Login is 1234, enter 01234 -> Save
3) Go to Adaptation
4) Enter 21 in "Channel Number"
5) Enter
6) Enter number corresponding to the total number of keys to be matched. The "Stored Value" is the number of keys currently matched. For ex, Enter 2 -> Save
7) Switch ignition off and remove key
8) Insert next key to ignition and switch ignition on again. Wait 15 sec. Repeat this step with each key until all keys have been matched.
9) Select: Immobilizer -> Login. Enter Login Code. Go to Adaptation
10) Enter 00 in "Channel Number"
11) Enter 0 and Save. This will learn ECU with Immobiliser.
T300 Key Programmer English / Spanish / Turkish T300 Chip Key Decoder
T300 v1.68 Key Programmer Install Steps:
For VW Transponder key matching with 5 digits Login Code
Procedure for adding transponder keys to vehicles with separate Immobilizer box:
(Golf 3, Passat B4, Transporter, Lupo, Sharan)
1) Switch ignition ON with new key.
2) Select: Immobilizer -> Login: Enter 5 numbers Login Code (add 0 if you have 4 digits Login Code). For example, if your Login is 1234, enter 1234 -> Save
3) Go to Adaptation
4) Enter 01 in "Channel Number"
5) Enter
6) Enter number corresponding to the total number of keys to be matched, The "Stored Value" is the number of keys currently matched. For example, Enter 2 -> Save
7) Switch ignition off and remove key
8) Insert next key to ignition and switch ignition on again. Wait 15 sec. Repeat this step with each key until all keys have been matched.
9) Select: Immobilizer -> Login. Enter Login Code. Go to Adaptation
10) Enter 00 in "Channel Number"
11) Enter 0 and Save. This will learn ECU with Immobiliser.
Procedure for adding transponder keys to vehicles with Immobilizer in the instrument cluster:
(Golf 2004, Passat B5, B6 )
1) Switch ignition ON with new key.
2) Select: Instrument -> Login: Enter 5 numbers Login Code (add 0 if you have 4 digits Login Code).For example, if your Login is 1234, enter 01234 -> Save
3) Go to Adaptation
4) Enter 21 in "Channel Number"
5) Enter
6) Enter number corresponding to the total number of keys to be matched. The "Stored Value" is the number of keys currently matched. For ex, Enter 2 -> Save
7) Switch ignition off and remove key
8) Insert next key to ignition and switch ignition on again. Wait 15 sec. Repeat this step with each key until all keys have been matched.
9) Select: Immobilizer -> Login. Enter Login Code. Go to Adaptation
10) Enter 00 in "Channel Number"
11) Enter 0 and Save. This will learn ECU with Immobiliser.
Saturday, January 14, 2017
Free software download link of V4.5.3 Xhorse VVDI PROG Programmer
New arrival VVDI Prog auto ecu programmer is famous Auto EEPROM MCU
ECU programmer from china Xhorse factory. VVDI Prog programmer can be
updated by internet. Xhorse VVDI Prog super programmer support almost auto EEPROM, MCU and ECU chips.
Original VVDI PROG V4.5.3 Xhorse VVDI PROG Programmer
Latest Software Version: V4.5.3
Firmware Version: 1.2.2
VVDI PROG V4.5.3 Free Download link:
https://mega.nz/#!0pgFQbiT!RwW0wEXMInsqUSuyyCEVaCEmONX3qGO5UgxP0hxVDzE
What is advantages of VVDI Prog:
1. 35080, 080D0, 160D0, erase quickly,erase Can be done in 10 s.
2. While reading MC9S12 series Chips, VVDIProg is more stable than XP Prog.
3. While attacking MC9S12 series Chips, VVDIProg is faster.
4. While reading some EEPROM Chips, Orange arenot able to recognize Chips.
5. Spared voltage attack function can beused when needed.
6. Spared CAN Cable, K-Line Cables Can beused when needed.
Original VVDI PROG V4.5.3 Xhorse VVDI PROG Programmer
Latest Software Version: V4.5.3
Firmware Version: 1.2.2
VVDI PROG V4.5.3 Free Download link:
https://mega.nz/#!0pgFQbiT!RwW0wEXMInsqUSuyyCEVaCEmONX3qGO5UgxP0hxVDzE
What is advantages of VVDI Prog:
1. 35080, 080D0, 160D0, erase quickly,erase Can be done in 10 s.
2. While reading MC9S12 series Chips, VVDIProg is more stable than XP Prog.
3. While attacking MC9S12 series Chips, VVDIProg is faster.
4. While reading some EEPROM Chips, Orange arenot able to recognize Chips.
5. Spared voltage attack function can beused when needed.
6. Spared CAN Cable, K-Line Cables Can beused when needed.
Monday, January 9, 2017
How about VAG CAN PRO VCP and VAG 5054A ODIS 3.0.3?
VAG CAN PRO is newly released diagnostic tool for vag group vehicles. obd2cartool.com VCP 5.5.1 diagnosis better and fast than vas 5054a. For most of users tested, VCP v5.5.1 is best for parametring and quick eeprom read; runs fast, while ODIS 3.0.3 is best for flashing; kind of slow when diagnose…
Why obd2cartool highly recommented VAG CAN Pro:
1. Newest Version V5.5.1
2. Diagnosis Better and faster than VAS 5054A
3. supports coding and programming, NO need engineer codes for coding or programming
4. supports CAN BUS, UDS, K-line protocols
5. Support Volkswagen, Audi, Seat, Skoda, made from 1990 to 2015
6. Multi-language:English, Czech, Danish, German, Hrvatski, Italian, Dutch, Polish, Russian, Spanish
7. Operation system: Windows XP, Windows 7
FAQs About clone VAG CAN PRO VPC 5.5.1:
Q: Is the VAG CAN PRO a full version?
A: yes, it’s VAG CAN full kit.
Q: Does clone vag can supports coding and programming?
A: definitely yes. VAG CAN PRO from obd2cartool.com can do offline coding and programming as the original. Moreover, the clone doesn’t need engineer codes for coding or programming, while the genuine needs it.
Q: Does it support UDS protocol?
A: yes. It supports CAN BUS, UDS, K-line.
Q: Any difference among VCDS, VCP, ODIS
A: VCDS is good for diagnosis, and simply coding; runs very fast. VCP is best for parametring and quick eeprom read; runs fast, ODIS 3.0.3 is best for flashing; kind of slow when diagnose…
Why obd2cartool highly recommented VAG CAN Pro:
1. Newest Version V5.5.1
2. Diagnosis Better and faster than VAS 5054A
3. supports coding and programming, NO need engineer codes for coding or programming
4. supports CAN BUS, UDS, K-line protocols
5. Support Volkswagen, Audi, Seat, Skoda, made from 1990 to 2015
6. Multi-language:English, Czech, Danish, German, Hrvatski, Italian, Dutch, Polish, Russian, Spanish
7. Operation system: Windows XP, Windows 7
FAQs About clone VAG CAN PRO VPC 5.5.1:
Q: Is the VAG CAN PRO a full version?
A: yes, it’s VAG CAN full kit.
Q: Does clone vag can supports coding and programming?
A: definitely yes. VAG CAN PRO from obd2cartool.com can do offline coding and programming as the original. Moreover, the clone doesn’t need engineer codes for coding or programming, while the genuine needs it.
Q: Does it support UDS protocol?
A: yes. It supports CAN BUS, UDS, K-line.
Q: Any difference among VCDS, VCP, ODIS
A: VCDS is good for diagnosis, and simply coding; runs very fast. VCP is best for parametring and quick eeprom read; runs fast, ODIS 3.0.3 is best for flashing; kind of slow when diagnose…
Saturday, January 7, 2017
Why new diy VAG 16.8.4 PCB not with TAN 38 Diodes?
Vag 16.8.4 is almost same as old version vagcom 11.11.3 with green pcb board original factory design. vcds 16.8.4 support update to different language and version as you demand, obd2cartool.com DIY vag com 16.8.4 new verison with full chip including L9637D chip.
But many clients compared with two kinds of PCB board,then will ask:
why VAG 16.8.4 there is missing TAN 38 diodes ? What is the purporse to not put it there ? It is not important to DIY VAG 16.8.4 board? And dont know purpose of that diode why is not there... now obd2cartool.com will explaine why new diy VAG 16.8.4 PCB not with TAN 38 Diodes?
TAN 38 Diodes its an ESD diode for CAN BUS protection!
This TAN38 three-pin chip, the function is electrostatic protection (ESD), it is used for CAN bus static protection.
VAG 11.11.3 cable version PCB board, CAN chip used MCP2551, not with electrostatic protection.
And now we VAG 16.84 version of the circuit board, CAN chip with a new generation of NXP1050, this chip comes with electrostatic protection, so do not need add this three feet TAN 38 Diodes chip.
From NXP1050 datasheet message:
The CANH and CANL lines are protected from automotive
electrical transients (according to “ISO 7637”; see Fig.6)
and are also protected from Electro-Static-Discharge
(ESD) of up to 4 kV from the human body.
more information can download MCP2551 and NXP1050 datasheet to confirm.
obd2cartool.com profession at test socket adapter,key programmer,locksmith tool,ic device programmer,odometer master,Ecu chiptuning,car pixel repair ribbon...
But many clients compared with two kinds of PCB board,then will ask:
why VAG 16.8.4 there is missing TAN 38 diodes ? What is the purporse to not put it there ? It is not important to DIY VAG 16.8.4 board? And dont know purpose of that diode why is not there... now obd2cartool.com will explaine why new diy VAG 16.8.4 PCB not with TAN 38 Diodes?
TAN 38 Diodes its an ESD diode for CAN BUS protection!
This TAN38 three-pin chip, the function is electrostatic protection (ESD), it is used for CAN bus static protection.
VAG 11.11.3 cable version PCB board, CAN chip used MCP2551, not with electrostatic protection.
And now we VAG 16.84 version of the circuit board, CAN chip with a new generation of NXP1050, this chip comes with electrostatic protection, so do not need add this three feet TAN 38 Diodes chip.
From NXP1050 datasheet message:
The CANH and CANL lines are protected from automotive
electrical transients (according to “ISO 7637”; see Fig.6)
and are also protected from Electro-Static-Discharge
(ESD) of up to 4 kV from the human body.
more information can download MCP2551 and NXP1050 datasheet to confirm.
obd2cartool.com profession at test socket adapter,key programmer,locksmith tool,ic device programmer,odometer master,Ecu chiptuning,car pixel repair ribbon...
Subscribe to:
Posts (Atom)


